As independent convenience store owners and operators here in Ontario, we all know what it’s like to run on high gear every single day. Between taking in vendor deliveries, juggling staff schedules, and keeping up with changing provincial regulations, our to-do lists never seem to get any shorter. When you’re managing all of that, it’s completely understandable how store layout and shelf organization end up pushed to the back burner.
But here’s the reality we face on the store floor every day: how we set up our shelves directly impacts how much profit we make per square foot.
While the big national corporate chains have entire teams designing their store layouts, independent operators like us can use those exact same strategies to build more profitable stores. That’s where planograms come in.
Let’s break down planogram basics in a straightforward, practical way so you can eliminate dead zones in your aisles, drive high-margin impulse purchases, and make your store easier for neighborhood regulars to shop.
What Exactly Is a Planogram (POG)?
A planogram (or POG) is simply a visual plan or diagram that maps out where every single item belongs on your shelves, cooler racks, and counter displays.
Instead of guessing where a new snack or beverage should go during a hectic morning restock, a planogram gives you and your store staff a clear, repeatable layout based on your sales numbers, profit targets, and customer shopping habits.
| SAMPLE CONVENIENCE SHELF LAYOUT |
| Top Shelf (60″+) : Specialty / Niche / Low-Turn SKUs |
| EYE LEVEL (48″-60″): HIGH-MARGIN IMPULSE PRODUCTS • Premium vapes, wellness, local goods |
| Touch Level (30″-48″): High-Demand Core Brands & Staples |
| Bottom Shelf (<30″): Bulk Items, Heavy Goods, Value Packs |
For independent store owners, planograms take out the guesswork. They make sure every foot of retail space is actively working to support your bottom line.
Why Independent Store Owners Need Planograms
A lot of us started out organizing shelves by instinct or letting vendor reps decide where new stock should sit. But when suppliers control your shelf space without a clear plan, low-margin products can quickly take over your most valuable retail real estate.
Taking charge of your floor layout with planograms gives us a few major operational wins:
- Bigger Basket Sizes: Placing high-margin products right where shoppers look naturally drives impulse sales and easy add-ons.
- Faster Restocking & Cleaner Stock Control: When every item has a fixed home, night shifts can restock shelves faster, spot empty slots immediately, and avoid overordering.
- A Smoother Shopping Experience: Convenience shoppers want to get in and out quickly. A clean, logical layout lets them find what they need in under two minutes.
- Better Control Over Delivery Reps: Having a designated layout stops delivery drivers from shifting your best profit drivers aside to fit extra stock of their own slow-moving products.
Simple Merchandising Rules That Help Build Better Stores
You don’t need fancy software or a corporate marketing degree to set up an effective shelf layout. You can get real results by applying a few practical merchandising rules across your main aisles:
1. Remember: Eye-Level Is Buy-Level
Products placed between 48 inches and 60 inches off the floor (right at eye level for the average adult) capture over 35% more visual attention than items on upper or lower shelves.
- Reserve eye-level shelf space strictly for high-margin categories; like functional wellness drinks, premium snacks, or local specialty goods.
- Put high-demand national staples on lower or touch-level shelves. Customers come into your store actively looking for those brands, so they’ll find them no matter where they’re placed.
2. Group Items by How People Shop
Shoppers look for quick solutions, not individual items in isolation. Grouping complementary products together naturally encourages cross-category sales:
- Put salty snacks and specialty chips right next to your cold beverage coolers.
- Set up your coffee station next to fresh pastries, breakfast bars, and travel sweeteners.
- Group windshield washer fluid, ice scrapers, and emergency car accessories together near your front counter or hardware shelf.
3. Give Top Sellers More Facings
A “facing” is simply the number of identical product packages visible on the front edge of a shelf.
- High-volume, top-selling items need multiple facings (3 to 4 rows wide) so you don’t run out during morning or evening rushes.
- Slower-moving niche items should be kept to 1 or 2 facings to preserve precious space for faster-moving, higher-margin inventory.
How to Set Up Your First Planogram in 4 Simple Steps
If you’re ready to clean up your aisles and protect your profit margins, follow this straightforward step-by-step process:
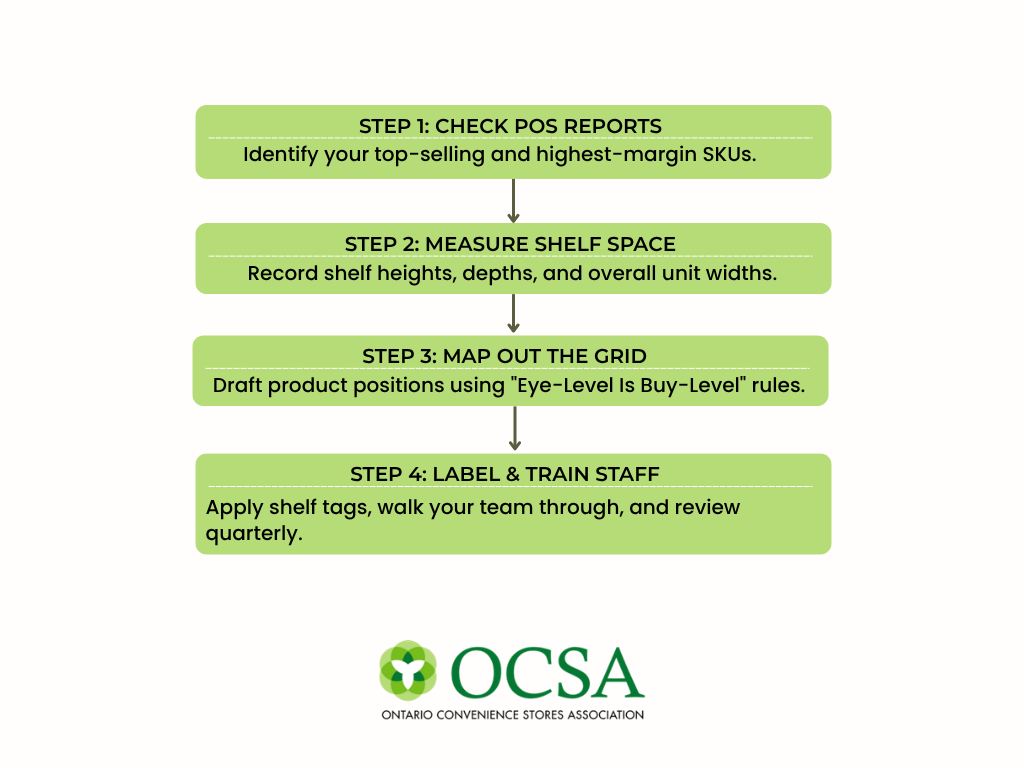
Step 1: Review Your Sales Data
Before moving anything around, pull a 90-day sales report from your Point-of-Sale (POS) system. Group your inventory into three simple categories:
- High Volume / High Margin: These get top priority for prime eye-level placement and extra facings.
- High Volume / Low Margin: These are your daily core staples; place them on secondary shelves with enough facings to meet demand.
- Low Volume / Low Margin: These are prime candidates for clear-outs or replacement.
Step 2: Measure Your Display Fixtures
Grab a tape measure and note the exact dimensions of your shelving units, cooler doors, and counter displays. Be sure to note shelf width, depth, and the vertical space between tiers.
Step 3: Map Out Your Layout
Use grid paper or a simple spreadsheet. Assign space to specific products based on your POS review, placing your best profit drivers straight into prime viewing areas.
Step 4: Tag Your Shelves and Guide Your Team
Once your layout is locked in:
- Put up shelf tags with clear product names and barcodes so staff know exactly where stock belongs.
- Walk your store team through the layout so evening shifts and weekend staff restock items accurately.
- Re-evaluate your layout every 60 to 90 days to adjust for seasonal changes and shifting customer habits.
Quick Reference Summary for Store Operators
| Action Step | Where to Focus | Expected Store Result |
| 1. Category Audit | POS sales & margin reports | Highlights actual profit drivers vs. wasted shelf space |
| 2. Prime Placement | Eye-level shelf real estate (48″-60″) | Sparks steady impulse buys on high-margin products |
| 3. Facing Allocation | Fast-selling, high-margin SKUs | Prevents stockouts and cuts restocking labor time |
| 4. Maintenance | Clear shelf tags & 90-day layout audits | Keeps aisles neat and prevents supplier clutter |
Mastering planogram basics is one of the most effective, low-cost steps we as independent operators can take to improve our stores. When we organize our shelves with clear intent, we make shopping easier for our local communities while building a stronger, more profitable business.
Standing Together with Ontario Retailers
The Ontario Convenience Stores Association (OCSA) is run by and for convenience store operators across our province. From advocating for store owners at Queen’s Park to negotiating member-exclusive savings programs, the OCSA gives independent retailers the support, voice, and resources we need to succeed.
Want to connect with fellow store owners and stay up to date on industry trends, regulations, and programs? Join the OCSA today or subscribe to our newsletter to keep your store ahead of the curve!